A\B testing with Route53 (An AWS Service)
Introduction
AWS Route 53 service has a relatively new feature (announced by December 2015) called traffic management. This service lets you manage how your end-users are routed to your application’s endpoints—whether in a single AWS region or distributed around the globe[i].
You can design easily both simple and sophisticated routing policies, using a flowchart GUI. In addition, under each "traffic policy" that you create, there is a built-in versioning mechanism, which helps keeping track of changes done to each traffic policy.
Although this service is meant to be implemented in a wide range of scenarios, in this post I'll explain how traffic management service can be used for A/B or A/B/N testing of a website.
Although many tools let you test A/B changes to a website within the same hosting instance, for sake of simplicity I'd suggest using a different instance for each change you want to test (e.g. replicating the website to more than one instance, so each instance has one version of the website). This way, we can just associate each policy to a specific endpoint (e.g. IP address of each instance).
In addition, a good practice that can be implemented under traffic management service, is predefining different routing policies, with a dummy IP address as endpoint and saving those policies as templates, and then just updating the templates' endpoints once you launch new instances containing specific changes.
Following those guidelines, I'll setup several templates for different A/B or A/B/N scenarios.
Getting started
First of all, in order to add a "traffic policy", you must first define a hosted zone under Route53. The traffic policies that you will create will be added to the routing table as Record Sets. Usually you'll add "A" records (e.g. "alias" records).
In order to access the traffic management service, open Route53 service from AWS management console, and choose "traffic policies". Then click on "Create traffic policy" to open the editor.
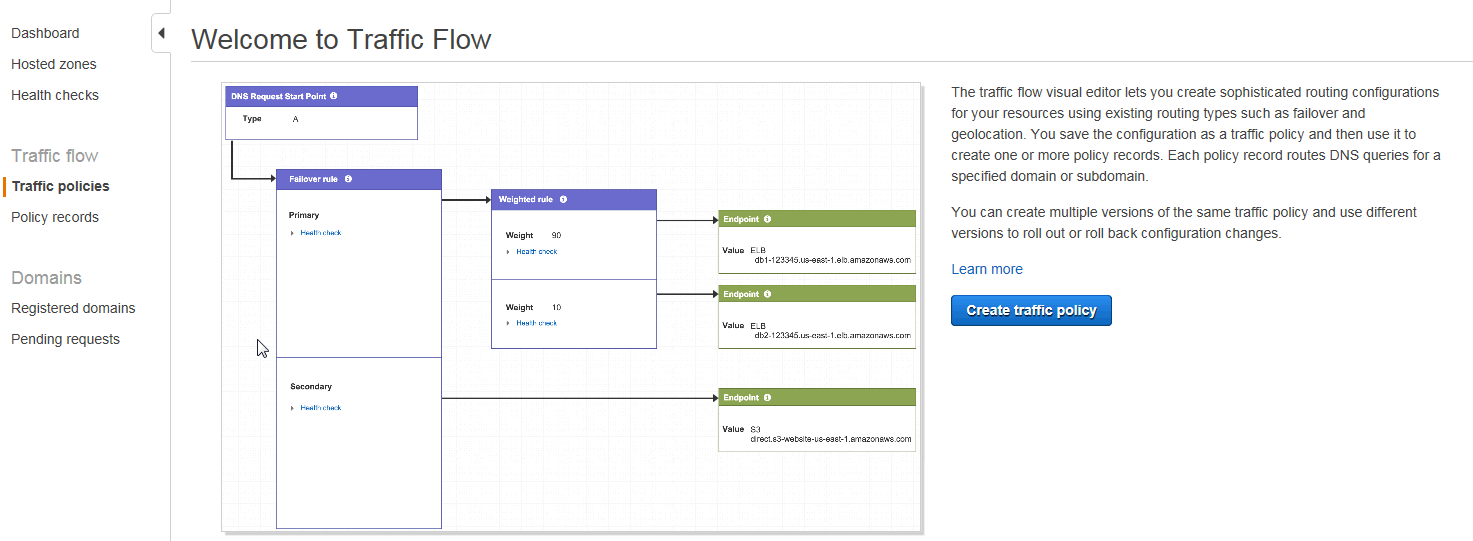
If this is the first time you access the service, you'll meet the following screen
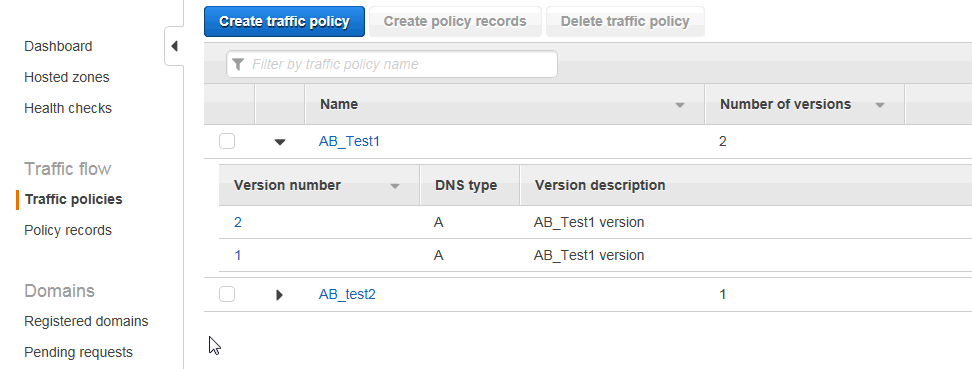
Otherwise, you should see the next screen:
Scenario 1 - Single location test (weights policy only)
The first scenario that can be defined is a simple one: testing a single change between two versions of a website, routing traffic according to weights, for example 50/50, 20/80, etc. In this scenario, we don't care about the geographic segmentation, just want to measure if there is a significant difference between versions.
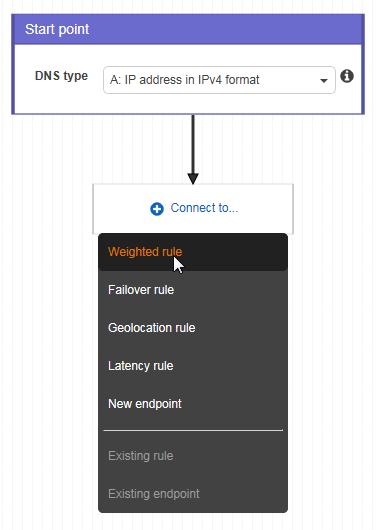
The routing rule we'll chose is "Weighted rule":
And the split will look as follow: We chose the specific weights (for example 50/50) and the endpoint to which each route will be connected:
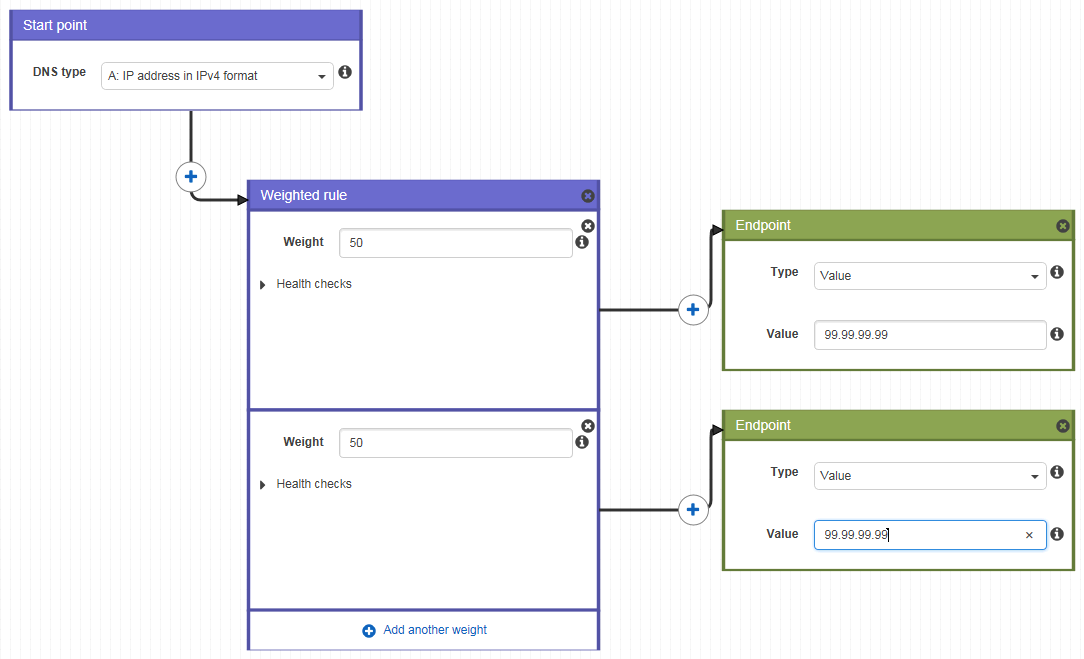
As mentioned earlier, we can just create a template, with both IP values pointing to the same host instance or a dummy IP, and once we launch the test and have a new IP address, we can just modify the template.
Scenario 2 – Two locations tested at once – same type of A/B test
In this scenario, we want to test if there is a significant different between different geographic locations. For example, we might want to test if users from Sweden behave the same way as the rest of the world (Note that "Location – Default" will route users from the rest of the world).
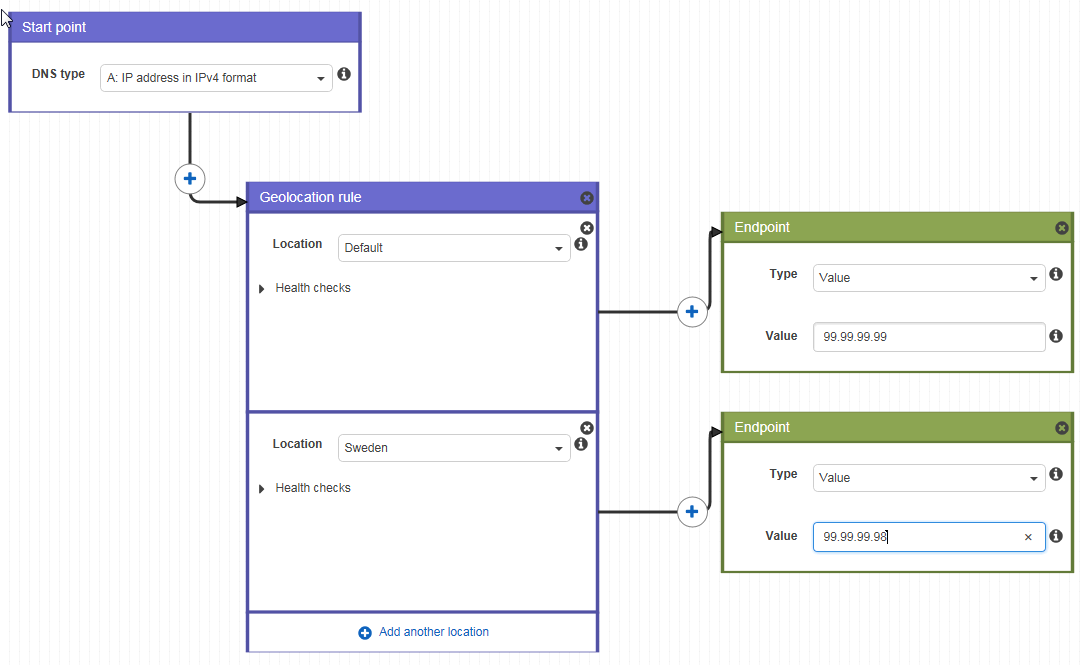
A variation of this test can be achieved by combining routing policies in such a way that we route 50% of Swedish traffic to site A and 50% to site B.
Note that the first 50% of Swedish traffic is routed to an "existing endpoint" (e.g. to the baseline site) and just the second one is routed to a new endpoint.
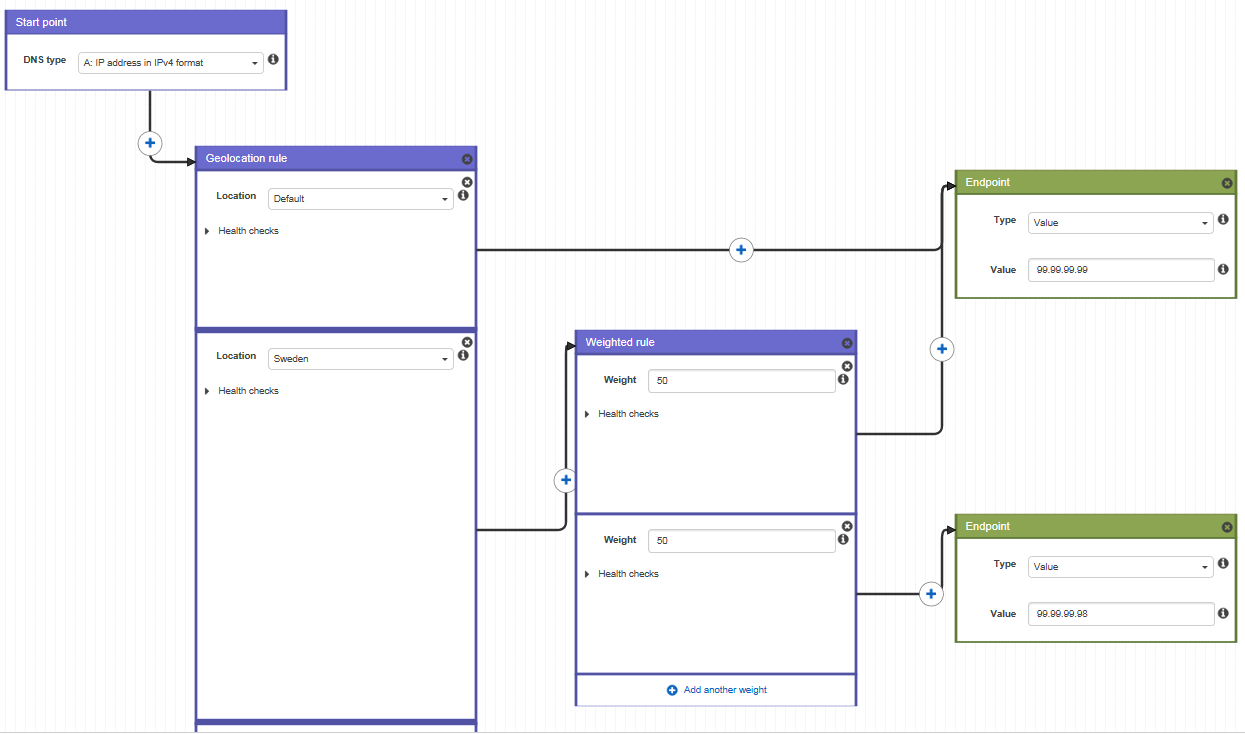
Scenario 3 – Several locations tested at once – different A/B test for each location.
In case you want to test many geographical locations all at once, and compare within each location if there is a significant difference, you can use the following scenario: First choose the "Geolocation rule" and add as many locations as desired. Then, chose the first location and add a "Weighted rule" with the desired weights and endpoints associated to each tested weight. Finally, for the rest of the geographical locations, just chose "connect to existing rule"
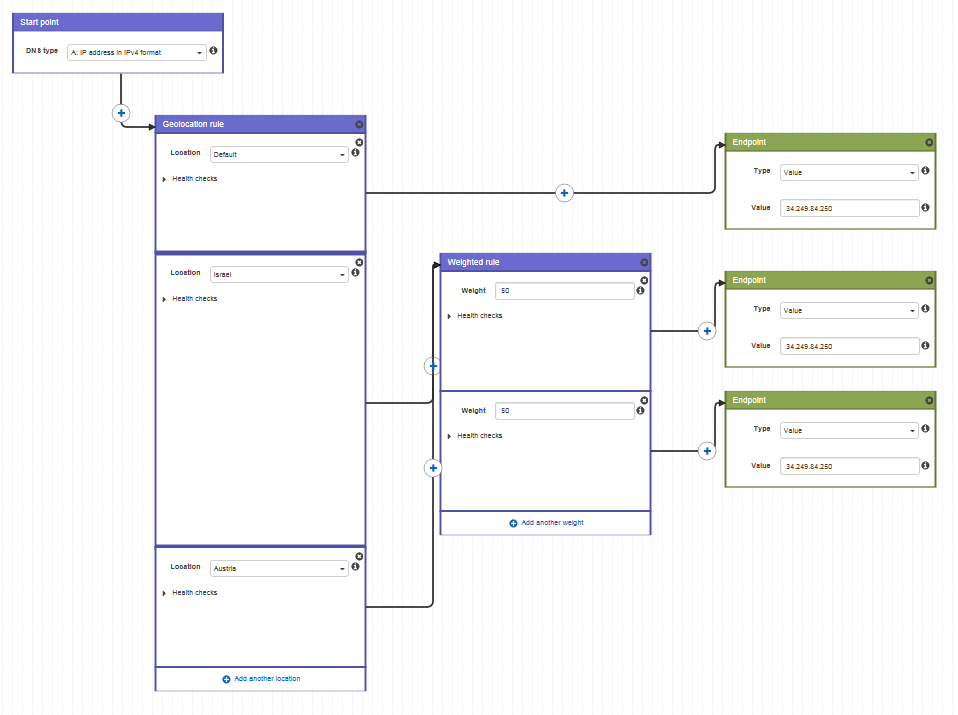
Scenario 4 – ABN Testing
Goes without saying that A/B tests can be converted into A/B/N tests implementing similar guidelines.
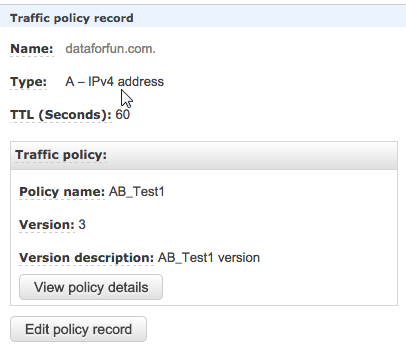
Once the traffic policies are created, you can either keep them idle or connect them to a "policy record".
Please note that managing policy records is not for free and currently costs $50 per policy record per month (this monthly price is prorated for partial usage during each month).
Also, you can associate different versions of a traffic policy with different hosted zones. You just need to make sure that the specific record set is not already defined in your hosted zone routing table!
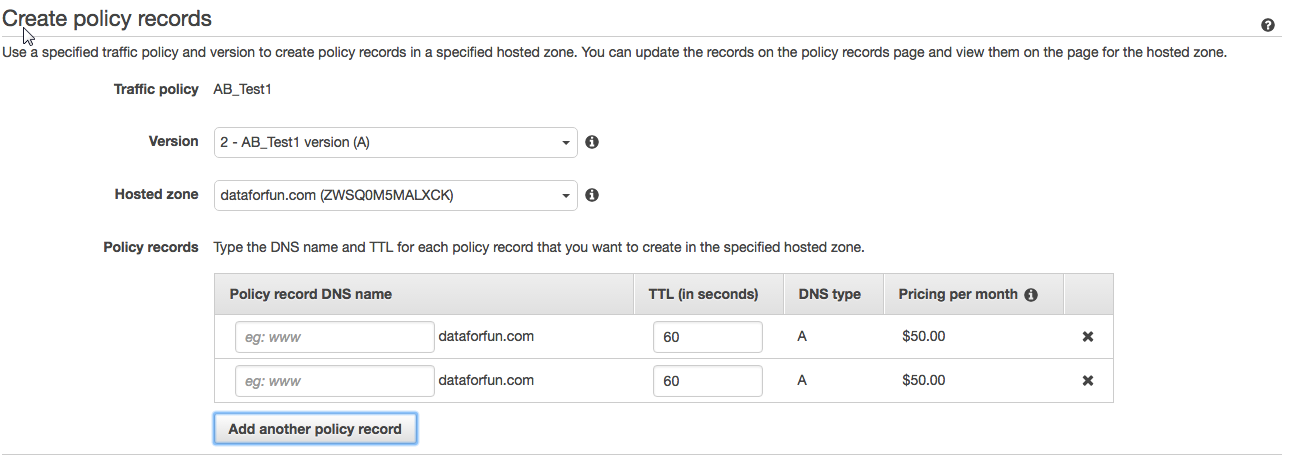
Once the status of the policy record is "Applied", you can just switch to the "hosted zone" and make sure a new record set was added:


A final note
Since this tool is used for routing traffic, you might want to get a deeper understanding of the traffic routed to each instance (how many users visited each instance) and even analyze user behaviors on each instance. For this purpose, you can combine analysis tools setup on each instance, such as Google Analytics (G.A.). Once statistics are gathered by G.A., you can proceed and execute statistic tests in order to understand if your changes are meaningful or not.
Happy A/B testing!